Showing posts with label DIY. Show all posts

17 July 2015

Bye Bye Blue

We've become big fans of the Habitat for Humanity ReStore this past year.  Probably their biggest fans.

Recently we found this darling little cupboard for a mere $30. Solid wood with a cute shape, but not our choice of color and that little trim thing was unusual. 


Look at her now!


She's beautiful. 

David likes going there for lumber (new and reclaimed), paints and stains for little projects, and he got all the caulking he needed for our house exterior as he was prepping the house for new paint. 

Monday we made a visit to The Rebuilding Center.  That place is truly amazing.  If finding old things and making them pretty is your thing, you've got to make a trip up there.  We expected it to be expensive based on its location in a trendy part of town, but everything is very well priced.  Old doors, windows, cabinets, hardware, light fixtures, old toilets if you like those, lumber; so many treasures. Next time we go we will be equipped with empty car space and loads of fruit snacks to keep the kids quiet for a few minutes or maybe hours (ha).  That would be a lot of fruit snacks. 

Our current big project is getting the house painted.  David is doing most of it because I tried once when I was home with the kids, and in the first two minutes of work Christian walked on the paint can lid and left white footprints on the porch and then Jonas crawled through it and added his hand prints to the trail. 

with kids


After bedtime.  Way better. 


Our house is cute the way it is, but I really want to simplify and make it a bit more classic. My favorite look in the entire world is a white farmhouse with black shutters, so I Googled 'white Victorian house' to see if it was a look we could force on our house.  Google said yes! 
one of the 9000 inspiration pictures I have


Bonus: we found shutters at The ReBuilding Center for $1/ea!  A nicer price than $40/pair at Home Depot. 

And...one last tiny project...Our front door has never been my favorite because the inside was painted light blue and the window had a lot of pink/blue/green stained glass.  I like stained glass and all, but pink and blue combos aren't my choice of colors.  I would love an old wooden door, but for now David replaced the window and I painted the inside white.  Our living room is much brighter with the change.
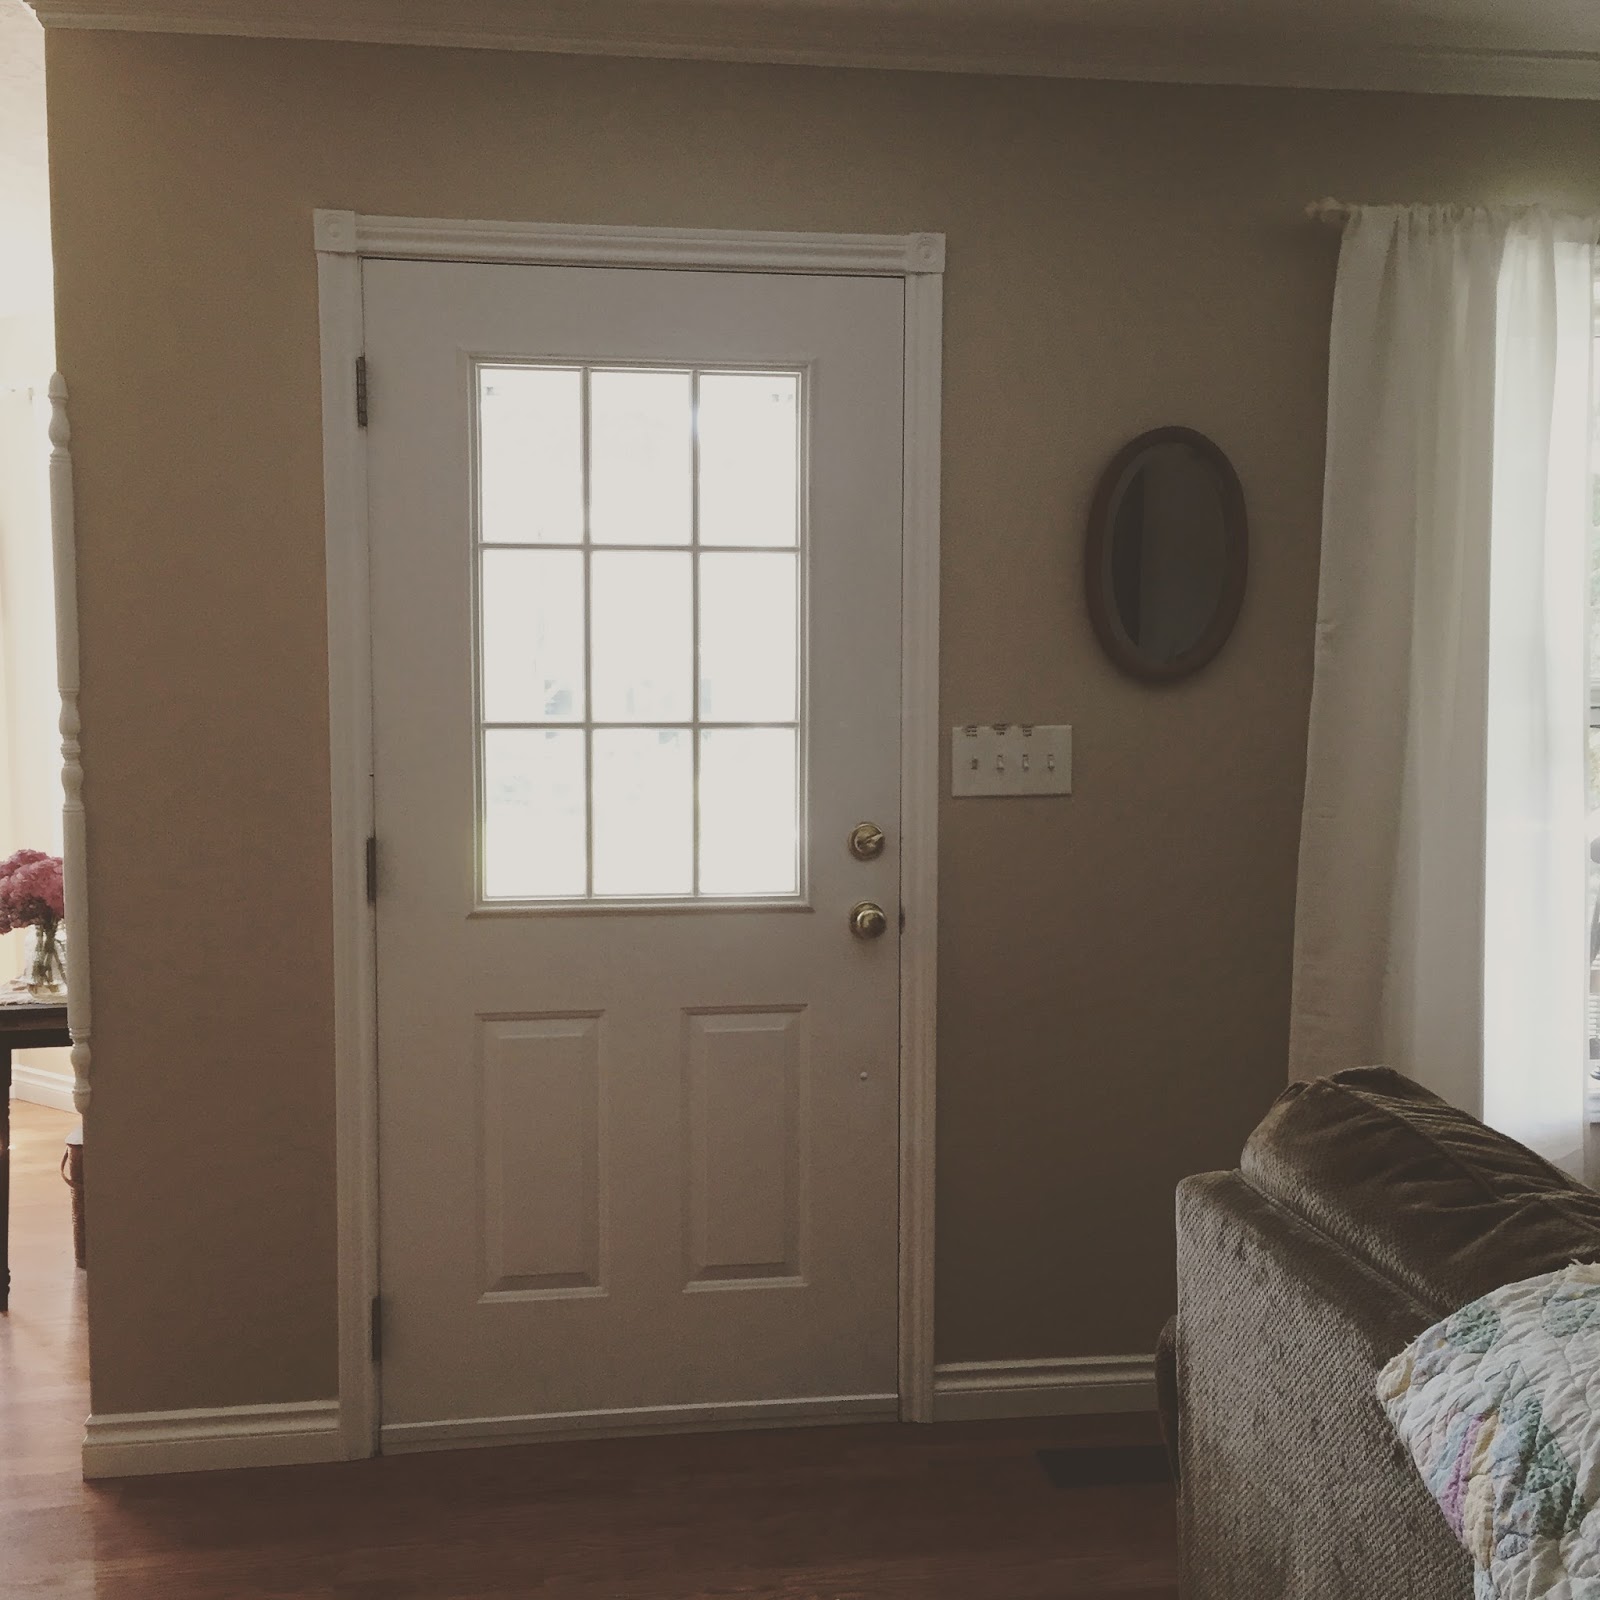
it's going to be fabulous with a Christmas wreath on it


exciting new door + exciting new walking skill


Sometime in the next decade we'll paint the door knob an oil rubbed bronze and paint the exterior of the door from white to an exciting color.  Like maybe a dark grey, the most exciting color of all.

Do you think our house is mad at us for all the un-Victorian-izing we're doing?  Un-Victorian-izing might be the wrong word (and also a made up word); simplifying sounds better, maybe?  Toning down the frill?  I don't love frill.  I love our house, but all the pinks and blues were overwhelming me.  

(P.S. We put the door window in the attic in case someone wants it someday. That seemed nice of us.)

new organization of the living room, too


29 April 2015

We Have a New Firepit

I went into the backyard Monday and found the big kids stomping around in the muddy garden.  I was so very close to telling them to get out, like literally had the words coming out of my mouth, when I realized this was a time to be quiet and let them be.  The only reason to make them stop was because I didn't feel like having to clean up the mess, but that's probably not always the best reason to say no.

Daph smeared mud up her legs and said to me, "Mud is really good for your skin, right?"

Sure.
lunch break at the mud spa


Another time to be quiet is when all three kids are down for rest at the same time, and you can lay in the hammock while your husband slaves away laying bricks for the new fire pit.  Did you know hammocks are amazing?  As long as you can figure out how to get in without falling back out. 


Speaking of fire pits, ours at the old house was a re-purposed wheel barrow, and we loved it.  We loved it so much we were afraid we wouldn't be able to top it. 

Oh, but top it we did.  Check it out:


We found an old woodstove at a salvage place, managed to haul the thing home (I think it weighs 9 million pounds), and now this back corner feels like a living room.  This week I got a bunch of planters put together for the area, and soon we're going to get some electricity out there so we can hang cafe lights.  David has plans for a play structure nearby.  Isn't it the cutest?

 And speaking of cute, here's Jonas rolling around on a bed.  This has nothing to do with fire pits or mud. 

02 April 2015

The Family Room

Nine months later and our upstairs family room is finally painted.  Small victories!

This room is technically a part of the 'master suite,' but as much as I would love an extra room to set up as a sewing room, or a sitting room, or a leave-mom-alone-she's-eating-her-hair room, a family room seemed the most useable idea for the largest number of people. 

The room isn't completed yet because I still need to purchase bamboo shades for the windows and finish the curtain for the kid's closet kitchen.  (They have a closet kitchen and it's just as cool as it sounds.)  (Which may not be very cool?)

Oh! And I have this super great idea for David to build me a faux-mantle to set the TV on.  Something like this:
i have no idea the original source...i've seen this many places


Right now the TV is on a bookshelf, but I think a mantle would add some fun visual interest and help make the room feel even cozier.  And it would give us a great place to hang Christmas stockings since stocking-wise we're not quite sure yet how to utilize our funky wood stove alcove downstairs. 

jonas's opinion on mom painting


Lighting in this room is a little hard because I hatehatehate using ceiling lighting and there's not a lot of space for lamps.  Lights on the old window saved the day!  I added a boxwood wreath because my current hobby involves making more of those than I have room for.  So many wreaths, so few spaces to hang them.


In the absence of 'after' photos of the family room, here are photos of the room being used for what we consider valuable family time. 
fighting


staring blank faced at the television


lots of messes


07 September 2014

At Least Jonas Has a Done-ish Room

I'm feeling brave enough to share two of our rooms that we have in fairly good liveable conditions.  If you think house pictures are lame, you'll hate this post.  If you happen to love a good 'before and after,' this one's for you. 

Jonas's nursery is the most completed room.  His car rug is in the big kid's room right now and I have at least one more thing to hang; other than that it's looking pretty swell.  I'm sure as he is in there snoozing he is appreciating the beauty around him.  He probably has really nice dreams.

His room required the most painting because I wanted to paint the trim.  Trim painting, especially going from dark red to white, is rather laborious.  It is not made much easier when done while home alone with 3 children. 

(My 'before' pictures aren't that great.  I took them while we were at the house for the home inspection, so was snapping quickly while trying to stay out of the way/keep the kids out of the way of the inspector.)
weird Dave


Daph needed to be in every single picture


We didn't mind the barn red trim in the room, but for a baby nursery I wanted white.  David liked the red closet doors, though, so we kept those for now.  The doors work for a baby boy room.  The beige was a bit darker than I wanted, and I didn't love the green above the picture rail, so the whole room got freshened up with new colors. 


David built this super cute rustic shelf


canvas + sharpie = 5 minute 'art' project copied from Pinterest


Hobby Lobby map


Christian doing unusual things


I didn't take a picture of the doorway, but this room has one of those cute little entry nooks that we're planning on doing this to:
this picture is everywhere but I can't find an original source


And that's the nursery!  Of course usually it looks like this: darkened, J sleeping in the rock-n-play, fan for white noise, random stuff on the dresser...perfectly imperfect, as our house typically is.


I was going to show the dining room, too, but this post is so huge we'll save that for another day.  Such exciting things to look forward to!

15 May 2014

This LEGO Table is Amazing

Years ago I saw a fantastic idea for a DIY LEGO table.  The only thing holding me back from making it was that we didn't want another kid table around.  Daphne has that same cheap Ikea table, but since she uses it all the time for things other than LEGOs/DUPLOS, I didn't want to make any permanent changes to the table top.  Having a regular table and a LEGO table was just a little over-the-top crazy for us.  SO.  I came up with a fantastic idea.  (At least I think it was me.  It's such a great idea that I really want to take the credit.)

David built a 'lid' that fits perfectly over the top of the Ikea table, and we turned the lid into the LEGO part.  Then we can take off the lid for regular table use, and storing the lid takes up way less space than another table.  Obviously.


Isn't it so creative and cute?  And aren't we geniuses?  The kids love it.  Major points for spending $0 on this project and successfully using up spare wood that was laying around.  

With more DIYing came more pillowcase jammies dresses, plus one pillowcase turned into a regular summer dress.  I love that they only take maybe 20 minutes to make.  I would make more except the kids share a dresser and they each get just one drawer.  Sadly, it actually IS possible to own too many clothes.  

Christian really needs summer PJs too...do you think he could get away with wearing these?  (David says no.)


Speaking of summer PJs, Daphne asked me why God is making the weather so hot.  I made her a strawberry milkshake and told her to be happy about the sunshine.  The hot weather has made Christian start napping again, and there will be no complaining about anything that induces napping. (Or making milkshakes, for that matter.) 


18 April 2013

Kitchen Fun, Where I Share All My Secrets

We made two wonderful discoveries with the little kitchen update we've just completed.

First off, the magical Annie Sloan Chalk Paint.  This is not paint that makes a chalkboard, this is a regular paint that is great for refinishing projects, like furniture or (yes!) trim that is varnished and would be a pain to sand down.  I learned all that I needed to know from this link here. 

It's a little spendy, but it was not hard for me to decide that my time is valuable and I did not need to spend it pulling off and sanding all the trim and doors in our house.  The chalk paint is the answer to all refinishing problems.  I've been watching Craiglist for a bunk bed for the kids and am not afraid to get an ugly one, knowing I can easily paint it with this paint.  It is good stuff.

Secondly, Rustoleum Oil Rubbed Bronze spray paint.  David has been having the time of his life taking down our switch plates and spraying them with this stuff (we are easily entertained around here).  The cheap plastic white switch plates hold the paint well and look like we went and bought the expensive bronze ones.  We didn't, folks, because we are too cheap for that.  As I'm painting doors he's also spray painting the door knobs, because again, why would we pay good cash money for new door knobs when we can just use spray paint? 

I learned of both of these paints via Pinterest.  Pinterest is the greatest.

Our kitchen update was nothing fancy: although we probably need a new sink and new counter tops would be nice, we just wanted to spruce it up a little.  New paint, new trim, new curtains, new art.  Cheap and fun.

Before:


After:


Before:


After:


This "In This House" sign was one of the first things I pinned after opening my Pinterest account two years ago.  If there was one thing spurring me on to paint the kitchen it was to have a place for this sign.  We modified it a bit with rules that were more personal to us, and I love having it in a place in our house where I can read it several times a day.  It's a good reminder for me to extend grace (because that's what we do in our house!) and accept my kids' mistakes (because we make mistakes here!) and to say 'I'm sorry' when I'm wrong (because we have to...the rules say!).  I love this sign. 


Same reason I have this written on my little kitchen white board right now:


I need the reminder every day.

I love having a brighter kitchen, and I love how the lighter trim opens the rooms up a bit more since our eyes are no longer being stopped by that old oak stuff. 

Daphne was a great helper, although it took weeks to get the paint out her hair and those pants and the sweatshirt are permanently stained.  I'm not really sure how she got so much paint on herself. 


And that's a wrap on the kitchen.  Finally. 

23 March 2013

DIYing 'Til the Cows Come Home

We are *this close* to being done with the kitchen.   The trim is painted after discovering some miracle paint that I will be telling you about later.  All that's left is the big art piece I'm working on for the wall and then getting everything hung on the walls.  Be on the edge of your seats: the reveal will knock your socks off.  Or be only mildly interesting.  It will be one of those. 

I sewed some new curtains for the kitchen and while at it, made a few new pillowcases for the living room.   This tutorial is great for an easy pillowcase cover, should you be needing to make yourself some pillowcases anytime soon.

I really love the look of old grain sack fabric, especially when stripes are involved, but what's with the crazy expensive, people?  So I went all crafty and sewed my pillowcases with utility fabric 40% off from Joann's and painted on my own stripes.  The discovery made here is that painting stripes is so fun. 


These days there are a lot of pillows with cute sayings stenciled on them and I knew that was something that would be fun in the living room. But of all the words in the entire world, deciding which few to use on a pillow proved to be quite difficult.  Then I ran across a little saying somewhere or other (sorry I have no where to link a source to) and knew I had found my match:


It's not deep or thought provoking but it makes me smile and it explains why I can't keep the living room magazine-perfectly clean and why the kids always come in from the backyard covered in dirt.  It also opens us up to the possibility that they eat bugs when I'm not looking.

Besides all this kitchen painting and pillow sewing, I came home from BSF the other day to David stripping wallpaper out of the stairwell.  So happy!  We've been wanting to spruce up the stairwell for years but haven't wanted to undertake the wallpaper stripping.  One thousand points to my go-getter of a husband. 
helping daddy


Now the stairwell is almost finished being painted with the same color as the kitchen and next week we'll pick out new carpet for the stairs.  Then it's trim painting in the living room!!!!  (I say with with  a lot of !!! because I'm trying to trick myself into being excited about it.)

All of a sudden I want to go take a nap. 

24 February 2013

Playroom Reveal

We've had this little 'office' corner in the family room downstairs...kind of a random corner where we kept wrapping paper/craft items/old check registers.  It was a nicely used corner before we had kids, but since they joined the family, not so much.

We (actually it was totally me) had the great idea to clear out the corner and turn it into a play room.

The idea has worked out so well for us.  The kids LOVE being down there, which is a nice change from them not loving being down there.   Now I can do laundry and stuff while they play.  One time I even sat down on the couch with a magazine and that was really nice until 2 minutes later when Christian noticed I was sitting all by myself.  Apparently he thought I looked lonely and needed a friend. 


The extra space has given us a chance to expand on Daphne's kitchen a bit.  Fortunately for us, we had an old wooden filing cabinet painted in the exact same paint of the nightstand that we converted into the sink and stove.  We're turning the filing cabinet into an oven.


The only things we had to buy were the shelf brackets to hang that shelf above her kitchen.  That means this new play room conversion cost us $1.69 x 2.  It's nice to feel so frugal.

Our new space has helped make both levels of the house more usable for our little family, but it has also given us more room to spread out when people are here.  Our house has plenty of square footage but it has tiny rooms, which makes it feel like we have to sit on people's laps when we have more than 5 people here.  Awkward.

I heard from someone recently that they had a night where they opened up their house for a few of their friends to drop their kids off, freeing up the parents to go on a date.   Totally something we could do.  So this afternoon we had 8 kids, including our own, hanging out with us.  With half of them upstairs and half downstairs our house didn't feel full at all.  I even did dishes because the kids were all playing so well together.  No crying, no fighting.  Really, it was a very pleasant afternoon.  As soon as David recovers we'll probably do it again.

I feel so hemmed in right now, like there's not much I can do outside of taking care of my tiny and semi-helpless children.  I share that we did this babysitting gig not to make us sound like such outstanding people but because it was encouraging to me to hear about a way I could do a small act of service even while taking care of my kids.  I feel almost badly that it was so little of an inconvenience for us.  Clearly we should have spent the afternoon building someone a house or something.